ETMRC HO Scale Layout
Rob D's Blog on Building Maintenance
Building maintenance has many facets and has also been documented in Rob D's blog.
Sat, 2018-11-10 06:20
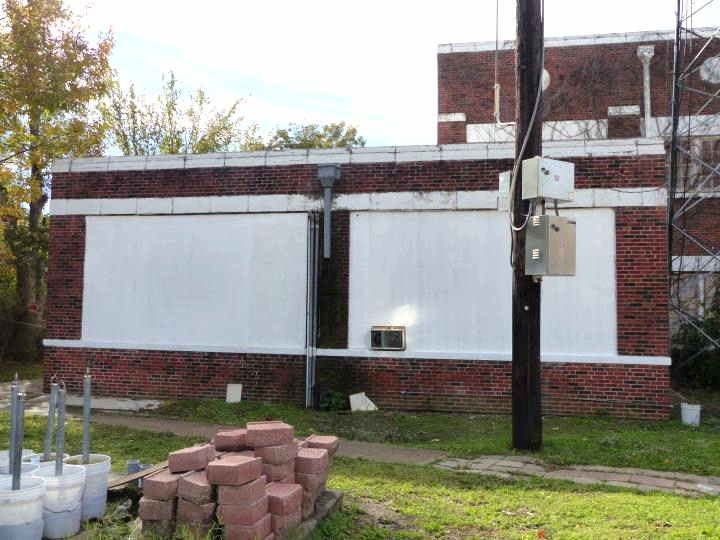
The outside of the building got some work as well. Some of this was not even our part of the building. Doing things like this really makes the folks in the city pleased that we are here. This side will cut down on the cold air that infiltrates our building.
Fri, 2018-11-09 13:39
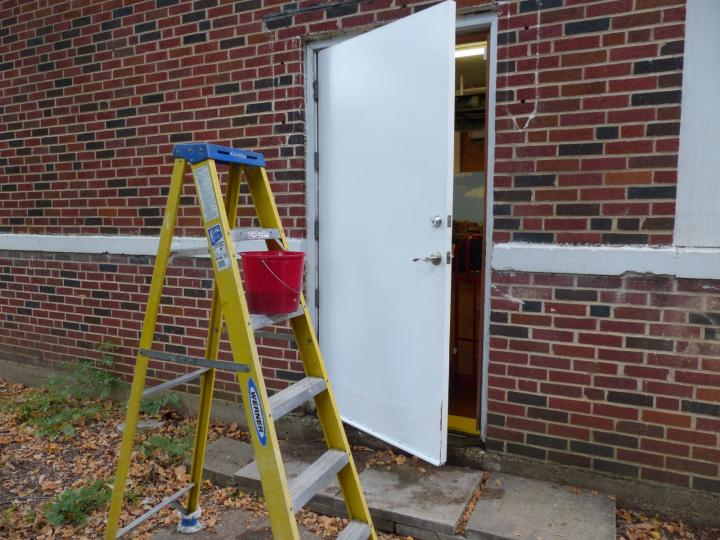
Now you guys knew there would be some outside work to be done. I cleaned off the outside of the building and then painted the white parts on the long wall and the newly enclosed windows.
I can really put paint on fast after the prep work is done. My friend Paul followed along and finished up the edges as I went blasting by with a roller and a five gallon bucket of pool paint. That's right the paint used was designed to coat the inside of swimming pools and it really seems to stand up to water and I suspect sunlight as well. Hopefully we have found a product that will really work well. We got it on sale as it was a discontinued product. I paid about 15 dollars for 5 5 gallon buckets of the stuff, it had a list price of either 115.00 per bucket or 155.00 per bucket, I think we did ok on the value for the product.
Wed, 2018-05-16 17:09 — Building window covering
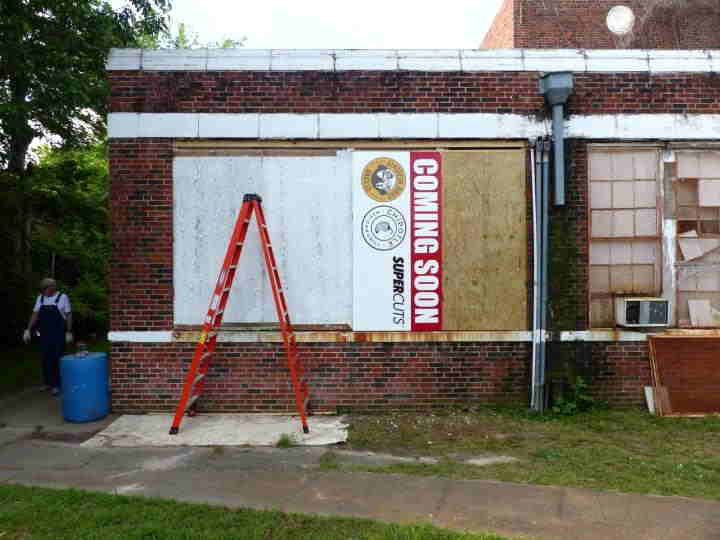
George is on his way back to work and you can see the before and after look here. The section with the plywood has insulation added and wooden frames to secure the plywood. The windows to the right will be next followed by the two on the end of the structure.

Here is a good look of what is to come six more windows to do and we will then have improved the looks of the building, cut down on the amount of heat and cold that hits our portion of the building depending on the season, it is always other than what is desired.

If you zoom in on the picture you can read the plaque that says this was built in 1941 by the WPA. When this is complete the building will look much better than it has in decades. For a long time it has looked very poorly.
Sun, 2017-09-10 15:24 — AC Installation
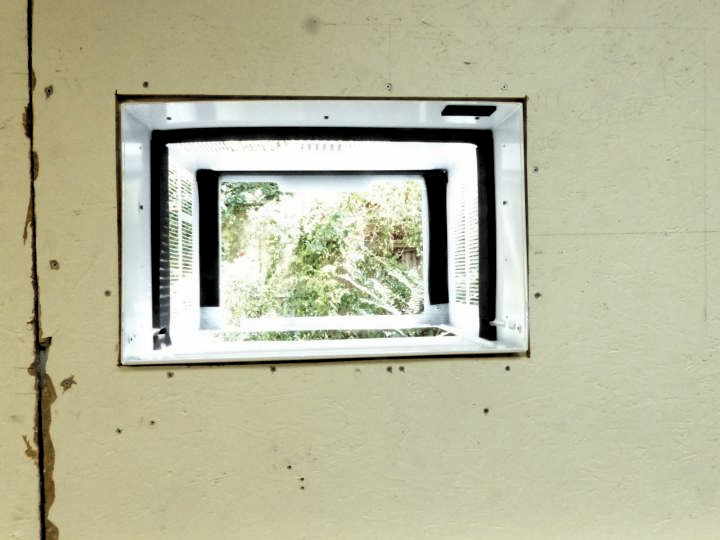
The case is installed.
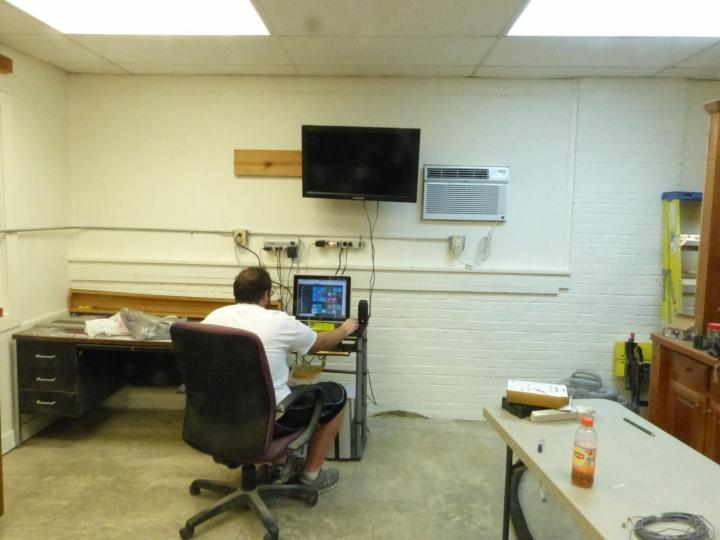
The ac unit is installed and working. The room is much cooler and cleaner now that we have this installed. We also moved the computer and the test track and the programing track to a dedicated desk. Here we have Jared helping to test out the monitor that is not working. Can you say major bummer! We can not get the unit to Power up. We were all set to have videos and something from Model Railroad Hobbyist on the big screen.
Sun, 2017-09-10 02:23 — AC Installation

Work begins on the last ac unit to install. Paul is working on the caulking that filled gaps in the panel. The panel will be removed and a sub frame installed along with insulation and then the ac unit. He and I will spend all day Saturday and a bit on Sunday to finish the project.
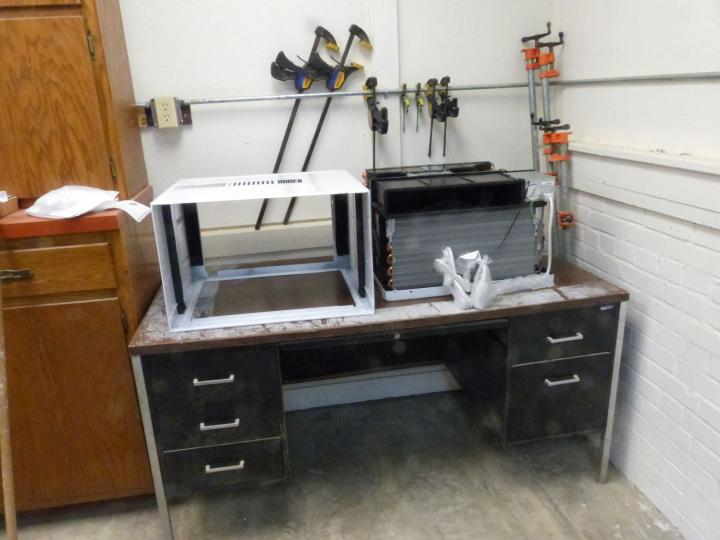
The new unit waiting to be installed. Case goes in and then the chassis slides in. Then plug and play.
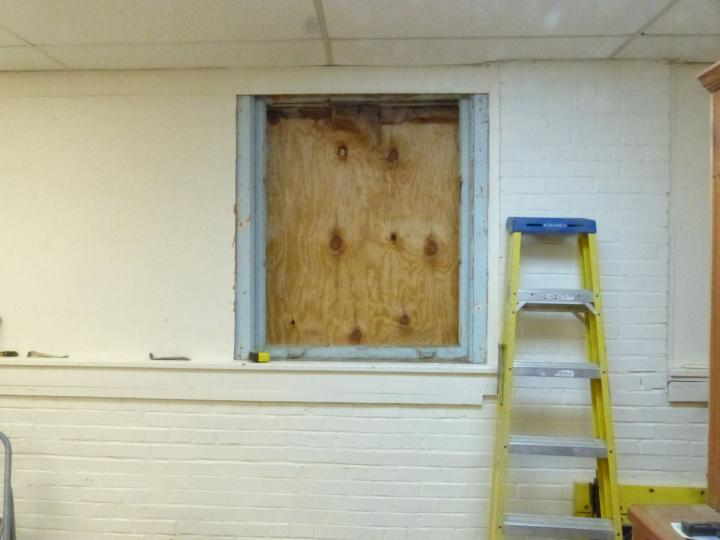
The glass and muntin strips have been removed along with the wiring which will be reinstalled when the project is completed.
Sunday we will finish the AC install and with any luck have the big monitor mounted to the wall to the left of the ac unit. It is nearly all over but the shouting now. This project involved Jared, Dave, Rob and Paul at this time. Earlier we had several others contribute to the project as well. More later.
Sun, 2017-08-13 08:26 — Carpentry

And lastly a shot of the last project of the carpentry club. We secured a partition wall, closed some gaps and we are now ready to clean some things and foam the gaps. After that some paint will be applied. Right now we are thinking of hitting the walls with a version of sky blue to let it blend with the layout. We will be having an open house soon for the bois-d 'arc bash and I think that will be in a few weeks. We may just try and have several trains running at the same time for a change should make for some interesting moments during the open house.
Sun, 2017-07-30 17:22 — Lightning Damage Repair

Back to layout wiring: Bob T electrical engineer is working on a power supply. Some components inside were found to have been cooked for lack of a better phrase. They were replaced and the units put back in service. Webmaster comment — Lightning Strike through the Fire Department phone lines to the radio room which is part of our building. Also fried some of our DCC system. A chip in each booster was replaced.
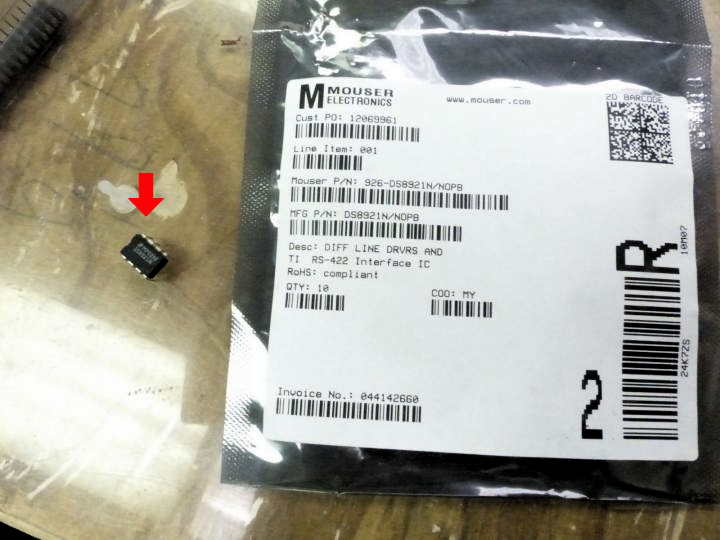
These little guys were replaced and the units then began to function properly. Webmaster comment — Mouser gives us excellent service. Order one day delivered the next.
Sun, 2017-07-30 17:22 — Lighting

New lights are being installed and some of the older ones repaired. I have done lots of renovations but I never saw speaker wire used to carry 110 volts to several lighting units till now. The wiring was brought up to standards and the lights properly installed.
Sat, 2017-07-29 04:18 — Carpentry

In the back one can see some more activity from the carpentry club, Rob and Paul. There are some large gaps in the ceiling and wall that allow dirt and debris from the gym and locker room next door to infiltrate into the layout room. They will be closed up and that will help keep heat and cooling in and dirt out.
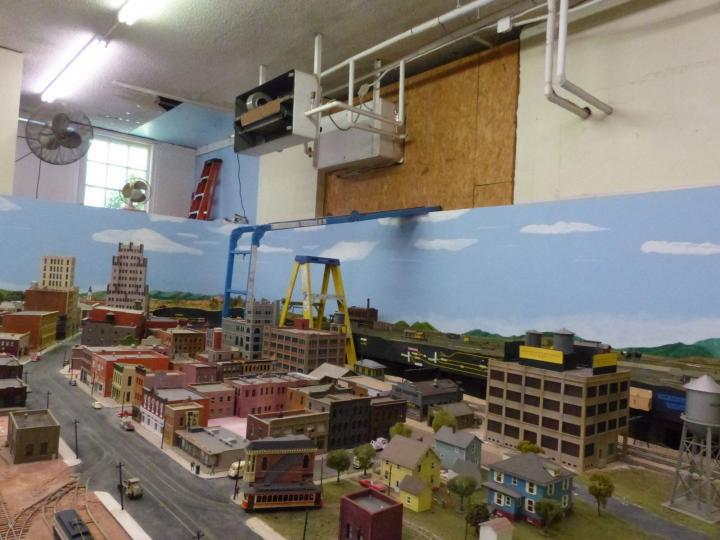
Another view.
Sun, 2017-04-23 06:58 — Landscaping

Paul was working out in the fresh air for part of the day mowing the lawn.
Mon, 2017-03-06 06:09 — Recycle

Now you knew there would be work besides running trains and taking photos. In addition to all the other clubs we have we now have a salvage club.

There is an additional truck load of material besides this. The valuable metal products rescued from dumpsters will be cut up sorted by grade and sold. The money will go to the club. Paul has been securing this material from one modernization project after another. At the time the orders were tear it out and throw it away. Paul saved lots of it and it will be turned into money for the club. That air conditioner works and was being thrown out. It will be installed in the new room. The trash cans are full of copper wire as are the two boxes on some more stacks of wire.
Sun, 2017-02-19 02:06 — Storage Closet
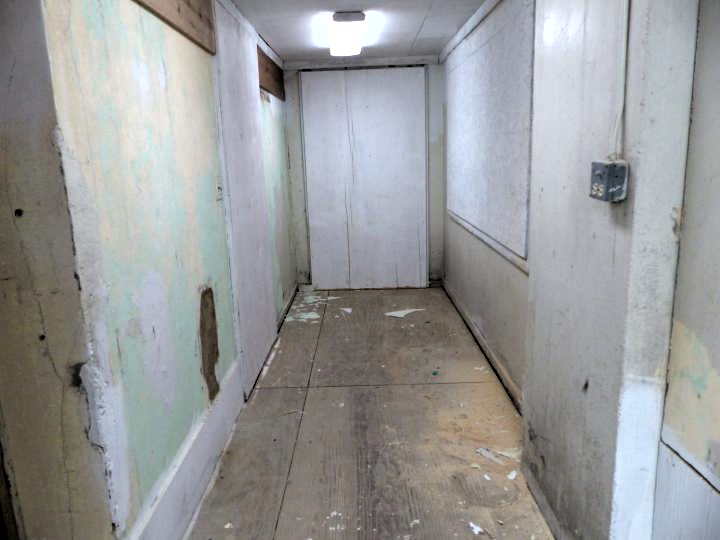
Above the new storage closet on Friday after Paul and I emptied it and did a bit of paint scraping. On Friday our goal was to have several folks working on the room getting it ready to paint.

Jared got after that paint. So did Paul and Tom B at different times as well as yours truly. The door opening was trimmed back and will be cased. Right now we are planning to eventually do all heavy construction work outside to keep the dust and dirt out there instead of in the area of the layout.
Sun, 2017-01-22 19:58 — Workroom
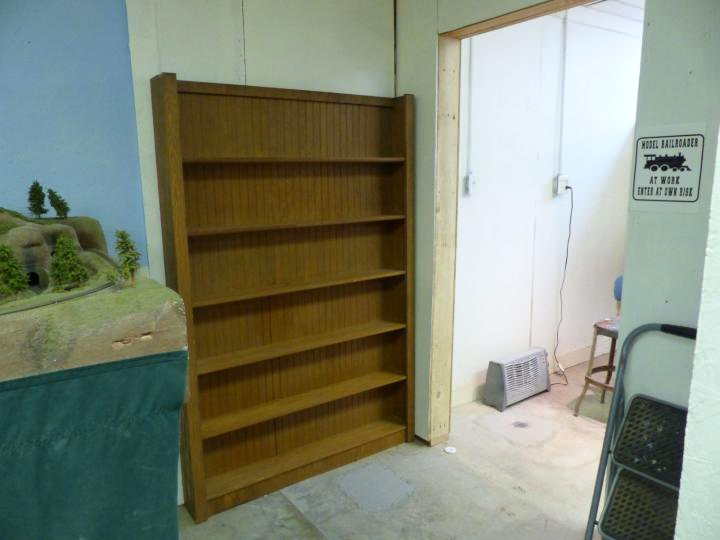
Now in addition to all the fun of hosting an open house for the last two days there was some work done by the carpentry club in preparation for these events. Looking toward our new addition that used to look like a condemned house we see a rescued shelf unit.
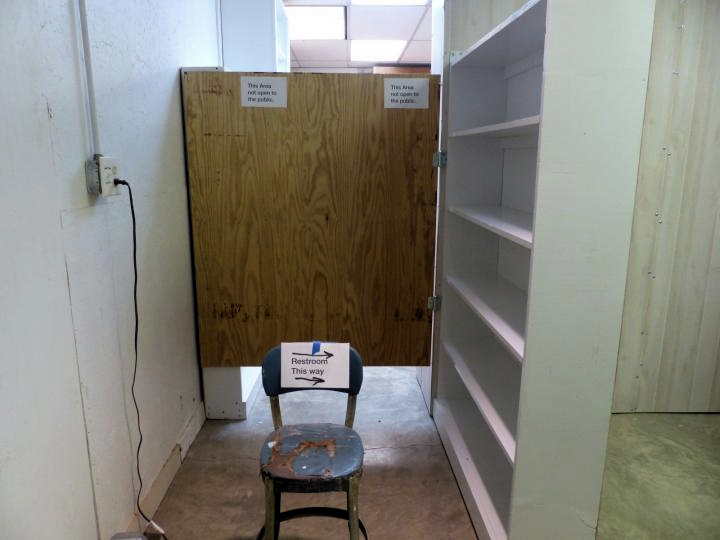
Looking toward the new room one can see the last needed bathroom wall in position that looks just like a shelf unit.

The entrance to the new bathroom still not completely finished but functional.
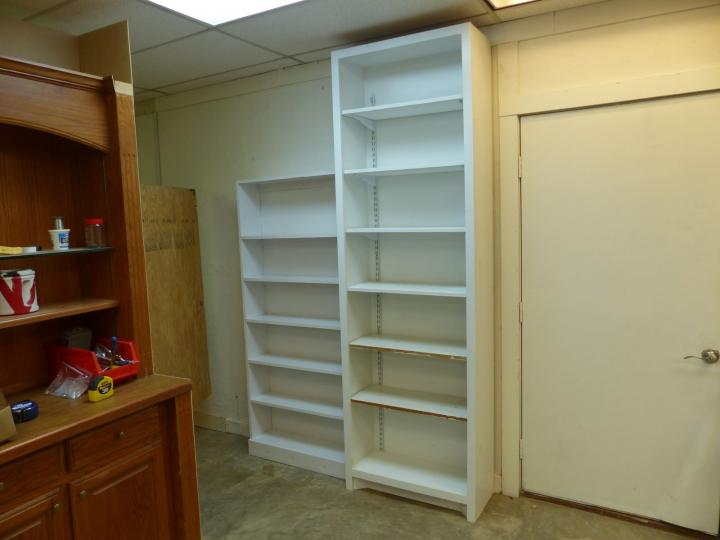
More new shelves behind the door and along the entrance to the new work room. And on the other side of the room and backing up to the new bathroom facilities we have more useable storage.
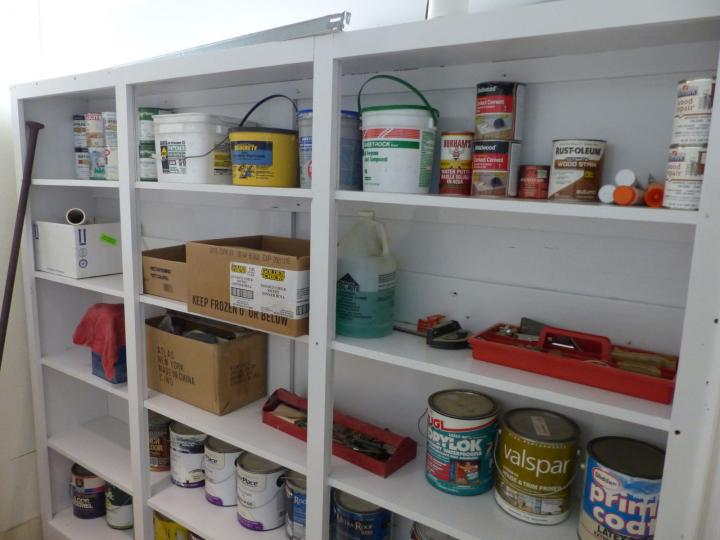
Great strides have been made but there is still lots to be done. After the new addition is completed we will be updating the old bathroom and finish insulating the room that contains the n scale and the Roy King memorial trolley layout. We plan to install a paint booth, a larger monitor on the wall that can play videos in the new room via cd or the computer and the world wide web. MRH could also be displayed on the big screen in high def. Just for comparison here is a shot of the old bathroom facilities.
Sun, 2016-11-13 02:09 — Workroom
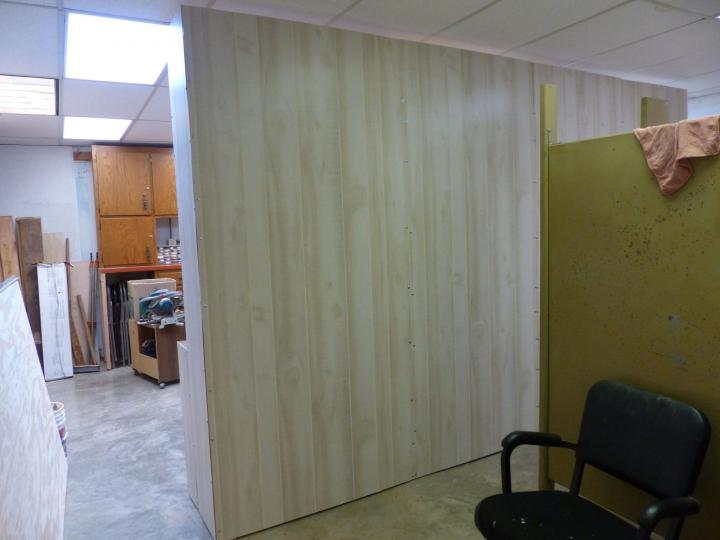
A new back was installed on the room divider between the restroom facilities and the work room. The side that will be used to enter the room was finished as well.

A new back was installed on this cabinet as well. Completing this added stability to the unit and eliminated a possible spot for items to fall behind the cabinet. The likely hood of such things happening is directly related to the cost and availability of the item in question. The fact that the cabinet is heavy and anchored to the wall makes it very difficult to move if something did get back there. Better to eliminate the possibility than to have to deal with it later.

We also picked up another shelving unit and it will get painted and then installed. You can also compare the before and after photos of the wood cabinet behind the metal one. We felt that instead of building partitions we would attempt to build as many of our walls as possible from shelving units that were salvaged from remodeling jobs. Recycling at it's finest and the cost of the units is next to nothing. One thing for sure is we can always find uses for additional storage space and it is really nice to have it.
Things are moving along and sooner or later we will get back to just running the model railroad and building models. I can hardly wait. 1/87 construction projects require much less lifting than the ones I have been doing for so long.
Sun, 2016-11-13 02:09 — Building Caulking of Windows

Last week I got some of the caulking completed, Today Paul and I finished it and if we were successful there should be no more water entering the building via the metal lintels over the old windows. Sometimes I feel like I am in an episode of this old house instead of a model railroad club.
Sun, 2016-10-16 05:23 — Workroom

This cabinet has been relocated and leveled and anchored to the wall. Due to the protruding end of the countertop not being attached to anything we thought it might need some support.

We have installed our braces for the counter top end. The bottoms have adjustable leveling feet and the top section is assembled with half lap joints so as to minimize thickness and maximize strength. We also gain a great place to store folding chairs.
Sat, 2016-10-08 22:57 — Workroom
As can be seen from the previous post there is still a lot of empty space on the left wall that needs a work/ storage unit.
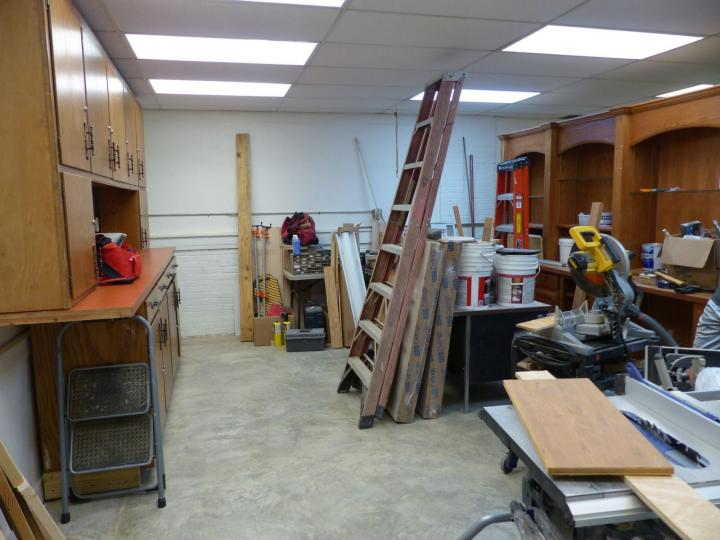
Not now.

After we had installed this unit and seen the effect in 3D we talked about moving it to the left approximately 40 inches. The move would allow better usage of the outside wall, to the right of the photo and cost us nothing in the way of useable space in the work area. I also thought of another reason to shift it. The opening, the area showing white wall has a space between it and the cabinets. A space like that will eat small parts that roll off the back of the counter. Due to the construction of our room we will need to add a back or at least a partial back to the space behind the cabinets to prevent things from dropping behind the cabinet.
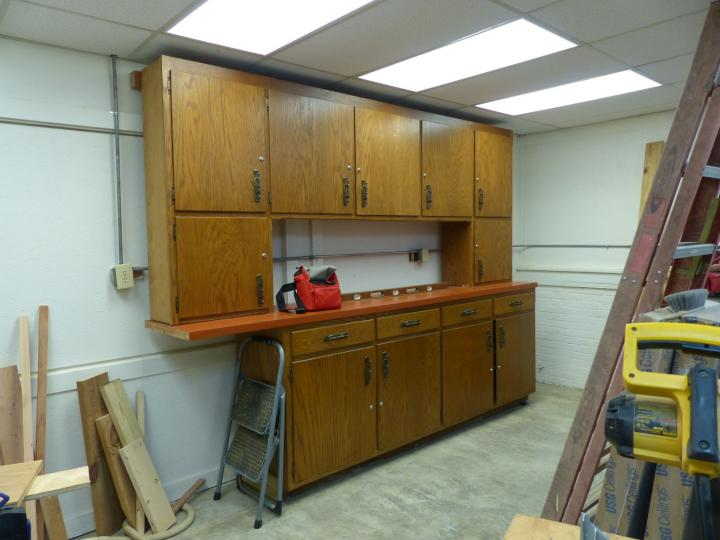
Not bad for salvaged cabinetry.
Mon, 2016-10-03 07:33 — Workroom
In addition to our visitors some work was done on the facilities, you knew the carpentry club was going to get into action didn't you?

The top for the work bench storage area was lifted and raised into position and then secured to the bottom units after it was properly aligned. This was fairly heavy to lift as I suspect it contained the equivalent of more than two sheets of 3/4 plywood. This is the back that will be covered and will become one of the walls to the new restroom facilities.
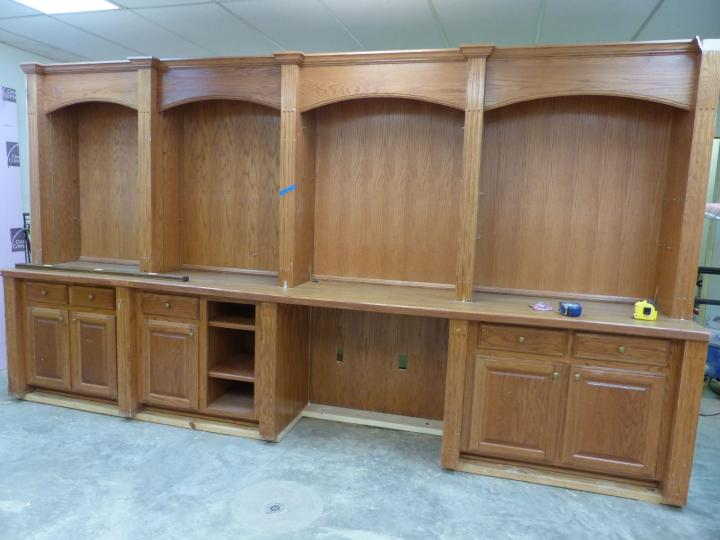
This is the side for model builders. There will be lots of storage and one work station. The main access to the space will be from the right of the cabinet. The space to the left will allow access to addition shelving units and the water heater. We are trying to get as much space outfitted with shelves and storage as possible. The idea is to have all the things that will likely be used in the work room in the work room. Tom B inquired about the possibility of adding a paint booth to the work areas and Paul and I thought that would be an excellent idea. Venting it to the outside will not be a difficult task as we have a nicely located outside wall.
Mon, 2016-09-19 09:19 — Workroom
We have been doing some things at the club as we can. Paul the ever vigilant club president has acquired some more cabinets that had to be removed from his place of employment. They were slated to go to the dumpster and would if they could not be removed from the structure rather quickly. A few of the pieces were about 13 feet long and would not fit into the basic pick up truck. They were also fairly heavy. Plans were made to have myself and a fairly sizeable flat bed trailer arrive on a Sunday afternoon. Jared also volunteered to help. Paul, Jared, and myself met at Paul's place of employment and began hauling the monsters out of the plant and loading them onto my trailer. We then carried them into the club house.
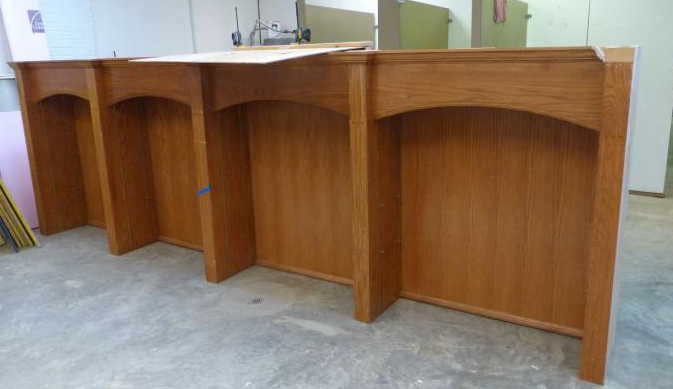
The plan is to get the base units set, bolt them to the concrete floor and install the upper portion on top of the counter top.
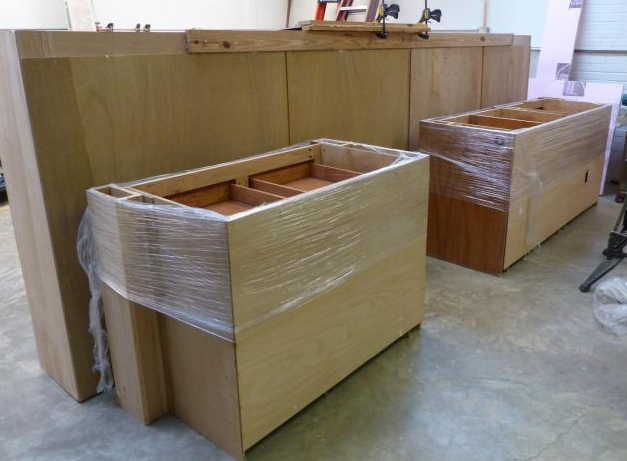
Here we have the base units that will have a desk like space between the two units. We also have the counter top and have since this photo was taken installed it.

In the photo above the mounting base can be seen that will be attached to the base units. At their previous location they were mounted to a wall. In this case they will become one of the walls to our new bathroom facilities. The area that Paul is working on will have additional cabinets installed to from a perpendicular wall to this one that will become the second bathroom wall. The base was assembled with pocket hole screws and attached to the cabinets so as to maintain the proper spacing of the units. It was then shimmed so the unit was level and plumb and after the countertop was attached it is ready to be anchored to the concrete.
Mon, 2016-09-05 17:30 — Storage Closet
Here is the little bit we got done. Lots of bare wood primed. Goes fast with a roller we put on about one gallon of paint. If I was in my normal shape we would have been done in about 1/2 the time and likely had the bathroom stalls painted too.

Below is another section coated with primer, we still have to do the floor and frame a door and properly frame in an opening so it can be turned into a wall.
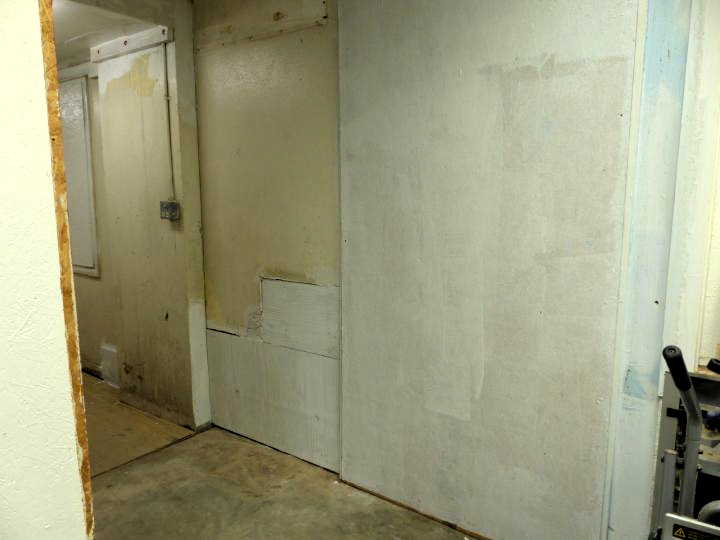
Next this area will get tools and construction supplies as well as other types of supplies that are presently all over the place. It will be connected to the work room for additional convenience.
Sun, 2016-08-28 17:26 — Storage Closet
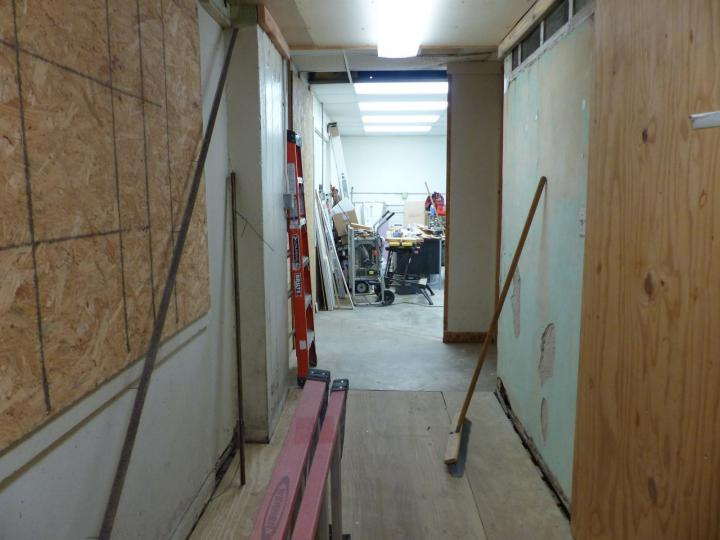
The carpentry club has struck again. This is where we started today. We have been working on the storage closet for a while. we only had a couple of hours so we tackled something small. We opened up a wall, secured a door, and now have access to the storage closet.
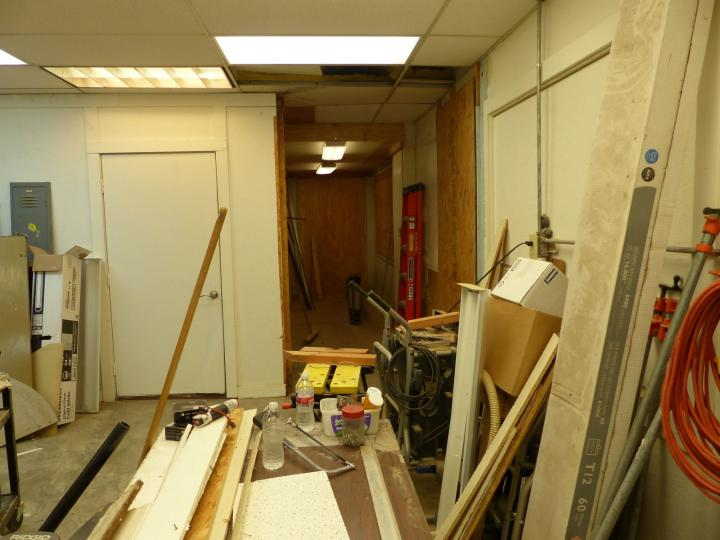
Here we see the closet from the area of the proposed work benches. Future work will involve framing the opening and insulating the closet or installing a door.
Sun, 2016-08-28 10:08 — Storage Closet
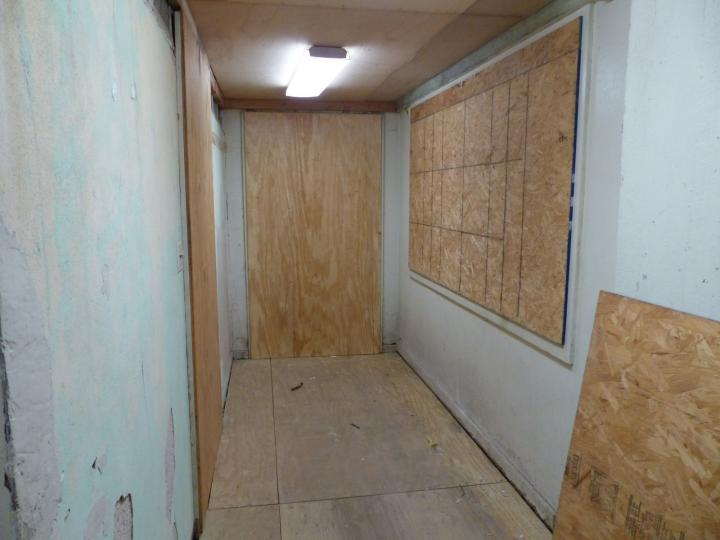
The storage closet is progressing nicely. two new lights were installed, a new floor, openings closed up, and soon a new door will be added.

The area in the back of the closet with the exposed studs will receive a new door that allows access to the new workroom that contains the new bathroom. The door in the picture goes to a storeroom for the city and is closed off. It will be covered by a sheet of osb in the left of the picture so it can be secured.
Sun, 2016-08-28 10:08 — Plumbing

The stalls have been painted and are going back into position to be painted. The horizontal stall wall in the foreground is waiting for a wide base so it can be set into position. All of them have been sanded to take off the rust and get things down to a surface that will accept paint. Paint can be applied soon.
Mon, 2016-08-08 21:49 — Plumbing

The location for our water heater is getting closer to being ready for the water heater.

Water heater is installed and producing hot water with out leaks. On my next day off Paul and I will be working on some things for the new bathroom, and with any luck he will be working on the storage closet. The water heater has been equipped with an anti back flow valve, a drain line for the pop off valve, a leak pan with drain that is aimed at a floor drain. This project is moving forward.
Sun, 2016-08-07 04:24 — Forestry
The new hole in the roof was repaired by Paul and myself.
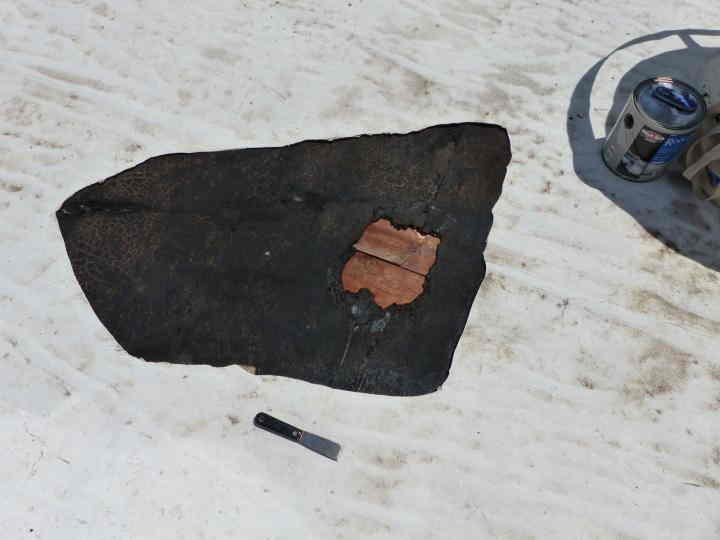
After clean up and repair of the decking from underneath we began building up layers of roof material, cement, sealant, filler, as required.

We ended up with something that looks like this as the top layer. There are 4 layers total each one larger than the previous and sealed to prevent water infiltration. The idea with the multiple layers is to build the area up so water will run from it to the undamaged areas and then drain from the roof and should the outer layer fail the next layer in will still be capable of sealing the area and diverting the water to a location that is desirable.
Tue, 2016-08-02 06:14 — Forestry
A very large tear in the membrane happened and a small hole was punched through the decking. By small it is about six inches in area, the hole. The membrane that will need to be patched will require a patch about 3 feet by 5 feet to fix properly.
We will fix the decking, then patch the membrane, and follow with a second over lapping patch over that one. That project will begin this Saturday in the early morning, followed by the club meeting, then the project will be completed after the meeting. The tree still is standing but we suspect any more falling branches will land in another area.
If it is not one thing it is another.
Thu, 2016-07-28 06:15 — Forestry
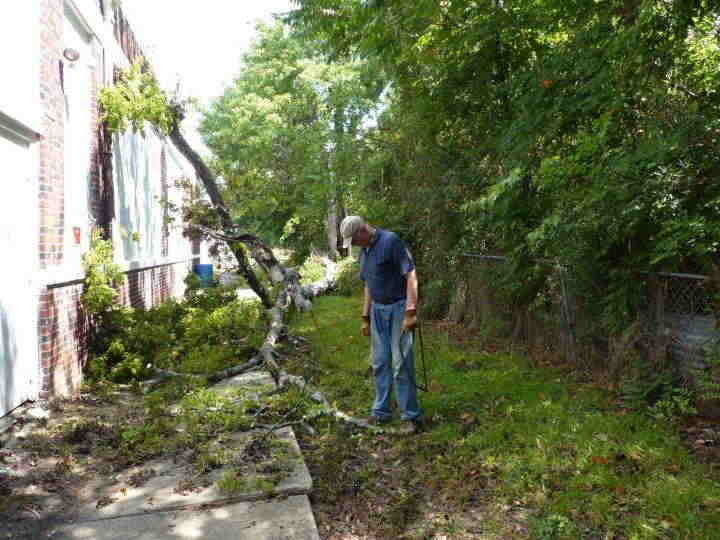
The Limb in question is about 50 feet in length and in places close to two feet in diameter.
Here we have Tom using the manually operated air cooled saw on some of the smaller limbs. He was assisted by Ron earlier in the day. Tom looked about done in by this point and had gone home by the time I arrived later in the afternoon with a chainsaw.

After a few hours help arrived in the form of Paul and a return visit by Ron with his chainsaw.
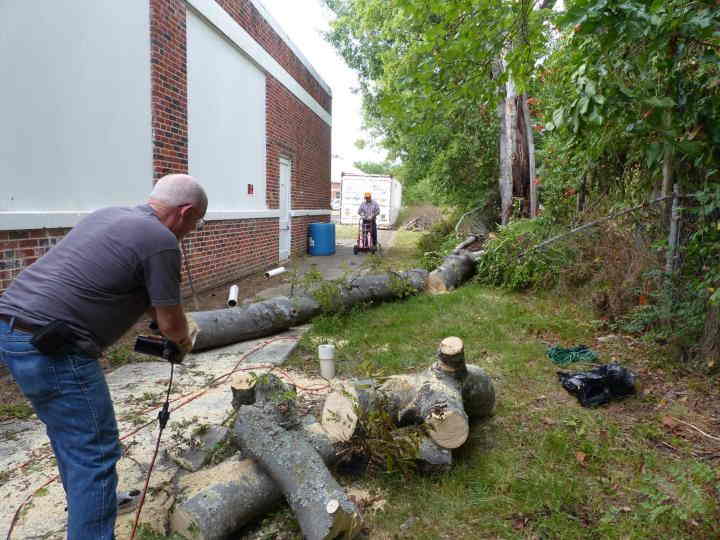
Paul is returning with a hand truck used to haul logs to his pickup truck. Ron is cutting my previous cut logs into smaller pieces. It seems they were heavier than desired by some of the participants in this exercise.
We did have some damage to our vent stack, sewer clean out, and to our side walk. The tree was heavy enough to break some of the concrete sidewalk upon impact.
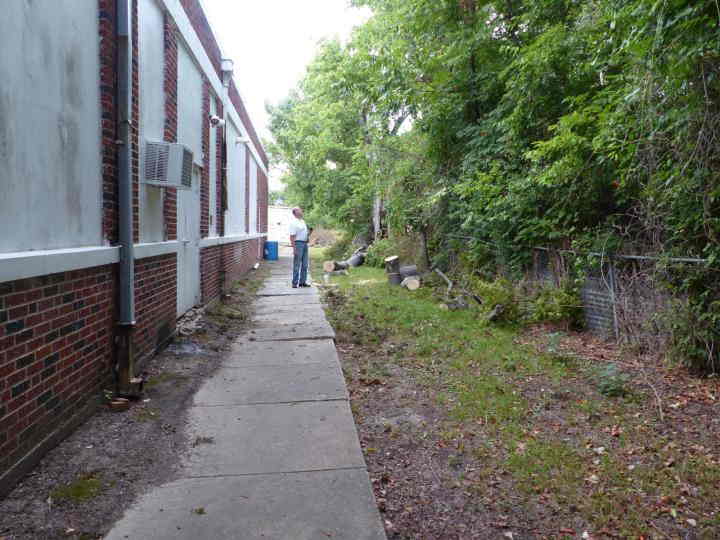
Tom has arrived for a second time and is surveying the scene. The forestry club has decided to call it a day. The sidewalk is open a load of lumber is ready to go to the dumpster, and several sweaty tired club members are resting inside near the air conditioner.
This little bit of work shows the value of team work. Several of us pitched in and a large job was cut into many smaller jobs and will be quickly accomplished.
Wed, 2016-07-27 11:08 — Forestry
While I was gone to the funeral a large tree that previously attacked the club house lost another giant limb. Bob T. sent me these two photos via the web, with a message that the carpentry club was going to meet tonight to try and get this out of the way. Damage to the club house looks to be minor at this time. So far Tom B. and Ron have been attacking the tree. I will be going down with a chainsaw in a few minutes. There will be others tonight if there is anything left when I get done with this tree.
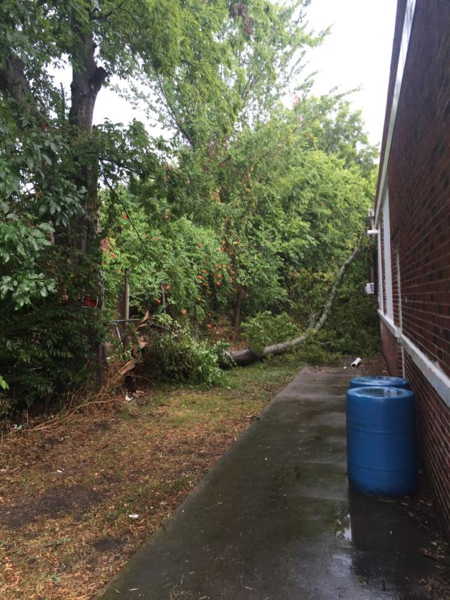
This is quite a large limb, it could easily be mistaken for an entire tree.
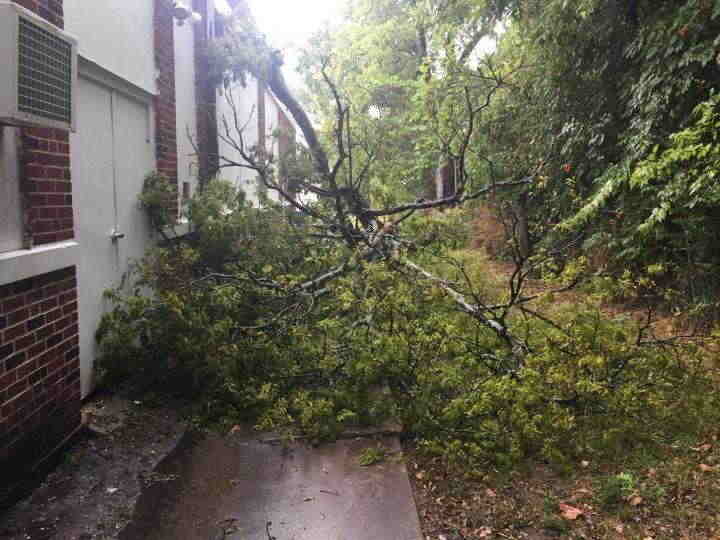
I will include some approximate measurements of the length of this thing to put it in perspective for those of you participating via the web. Now the model railroad and carpentry club is adding a forestry section. I thought we might be getting some first hand experience at logging operations with this one. I wonder if there is any possible use for the wood in the logging section of the layout hmmmm. If you guys have any ideas don't keep them to yourselves post away.
Sun, 2016-07-10 21:06 — Plumbing
I went down to the club on Sunday for a few hours and finished the through the wall pressure relief pipe for the new water heater, We have not bought the water heater yet but Paul will likely buy it this week. The multiple holes were cut for the pipes and access point to the shut off lever, the access panel was installed and the sheeting was placed on the wall.
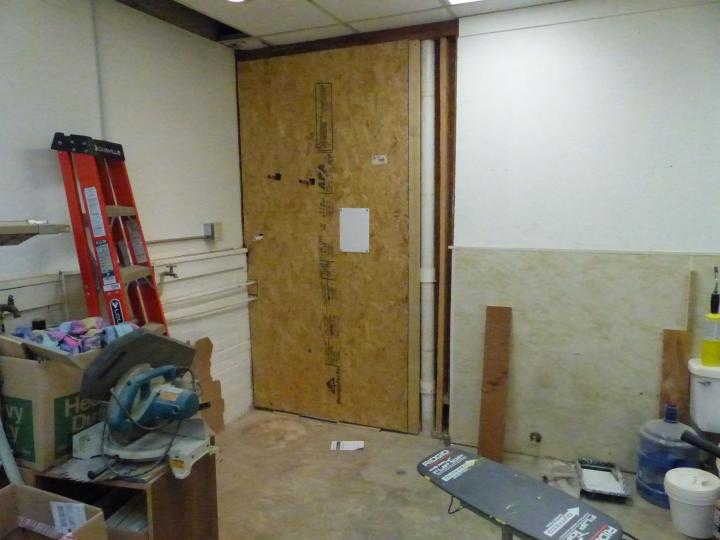
A bit of filler pieces and some paint and we will be ready for the water heater. After that the shelving units we will be using to build the bathroom walls will be installed and the new bathroom will be moving fast toward completion. After that a third ac unit will be added so we will have ac in the back room as well as the front two rooms.
Sun, 2016-06-26 08:27 — Plumbing

Here we can see a new sill plate being cut to replace the one that was rotted away from water damage. There used to be a water heater here that was allowed to leak for an extended time period. There is no load on this wall it is only to support the wall board separating the layout rooms from the work space. It will however be supporting our new small water heater when we buy it.
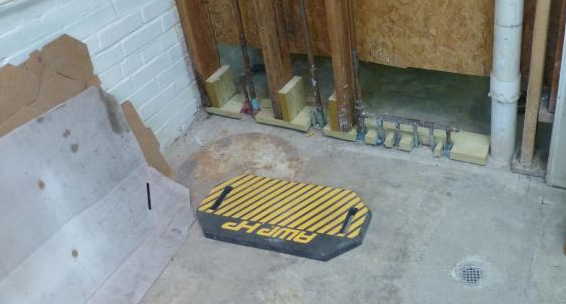
Due to the ridge in the concrete between the plumbing manifold the 2x6 will not rest tight to the floor but will serve adequately as a nailer for the wall board and base that will cover the pipes. One can see now the benefit of having a drain in the floor so close to a water heater.
Sun, 2016-06-12 00:44 — Plumbing
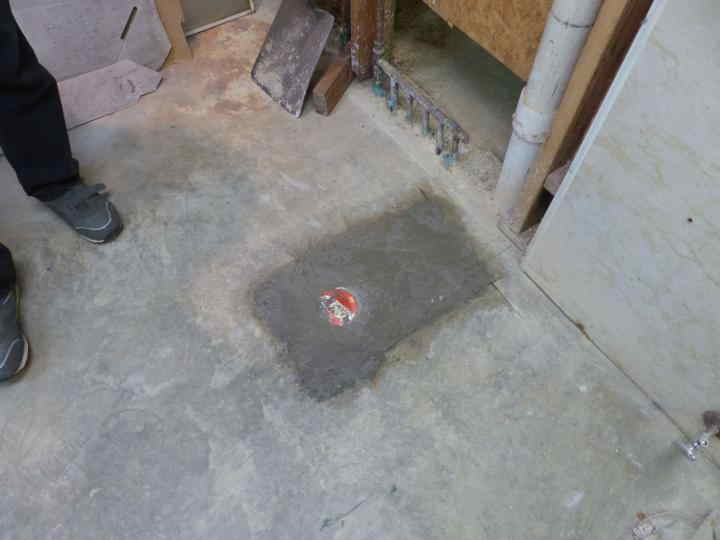
Tom M did some nice concrete work in filling as many of the holes as he could. We cut the holes in the slab and did some plumbing work and now our future bathroom will be surrounded with drains. We will also have things like the water heater bracketed with drains and plenty to intercept the water leaks from the school buildings boiler that we have seen as well as any potential ones. If a large leak does happen no one will complain that we have too many floor drains.
Sun, 2016-04-03 05:53 — Tool and Material Storage Area

A missing chunk of wall was filled in with Plywood and some trim added so the door that is no longer in use can be sheeted over. Next thing in this area will be the removal of the sheeting on the right so a door to the new found space can be added. The new space will be a tool and material storage area connected to the work room addition. Little projects or parts of ongoing projects are helpful when one has an hour or two left in the way of time after the completion of some other project or part of a project. It often results in nothing being completed but moves several things closer to completion. The misconception arises when folks don't realize all that it took to complete something but just happen to notice several things completed on the same day.
Mon, 2016-03-21 00:41 — Plumbing

In the photo above one can see we had too much dirt in the hole and we were in need of a bit more length to fit our plumbing inside the hole in the concrete. One thing we thought about was areas we could have leaks. The area where the mop is resting will be the site of our new hot water heater, woohoo, hot water will be available. So since hot water heaters seem to be designed to fail and leak lots of water I thought it wood be nice to have a drain very close. In the area to the right are two toilets and a sink and this drain and one that will be installed to the right of the picture will allow us to have drains on both sides of the bathroom. There is also a large boiler for hot water heat in the rest of the building. That boiler developed a serious leak recently and was fixed but not until the end of the heating season! So we have more drains than what many folks would install however we want to be sure of intercepting the flood should it happen.
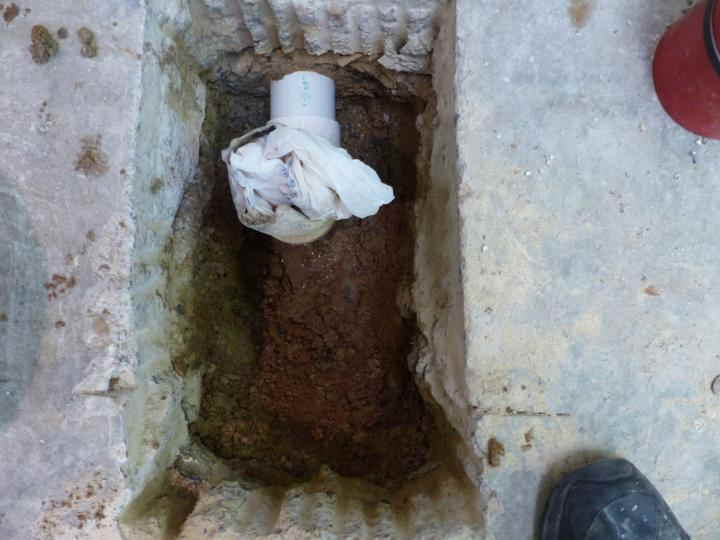
The old plumbing, no P trap. The old stuff will be cut behind the fitting leaving a straight pipe to be reduced from 4 inch to 2 inches. Which will take the P trap and drain. The P trap is needed to prevent odors and gas from the sewer from entering the living space.

Installed. Now due to the magic of photography the drain looks very deep in relation to the surface of the surrounding concrete, it is actually about 3/4 of an inch below the surrounding surface and should be just fine at that depth. One more to complete and then we can begin the concrete work where the drains are. Although we will likely wait until we get all of the plumbing done and do a leak test before covering all the holes as some contain hot and cold water lines as well.
So much for the plumbers club, beat George to that one!
Sat, 2016-03-05 16:07 — Closet was Hall Floor
Other projects we have going on are the closet project and it is progressing nicely. The floor is installed.

The cross braces are attachment points for the plywood that will cover the old openings into this space. We have finished closing two of the openings and have 3 more to go.

Already this is beginning to look to look far and away better than what we started with. It looks like another day to cut and dado the required cross pieces and fit plywood to the openings that remain and to get a new rough opening for a door put in the end wall opposite the one above that will connect directly with our work room.
Wed, 2016-03-02 08:53 — Hall Floor
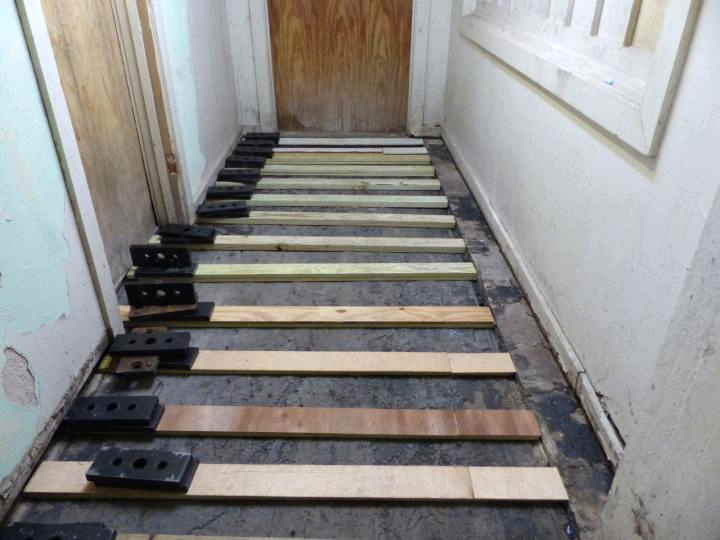
We have are sleepers attached to the concrete, with the required shims glued in place. We had a very uneven base for the sub floor and shimmed to get things fairly close. This will not be level and smooth like a basket ball court, but should now be at least close like the average basement. The weights came from some exercise machines that were thrown out. My friend Paul salvages every thing he can get his hands on and we generally find uses for it. It is the height of recycling, instead of throwing it out find a way to reuse it if possible. It often saves money in more than one way and can be an instead of buying something new.
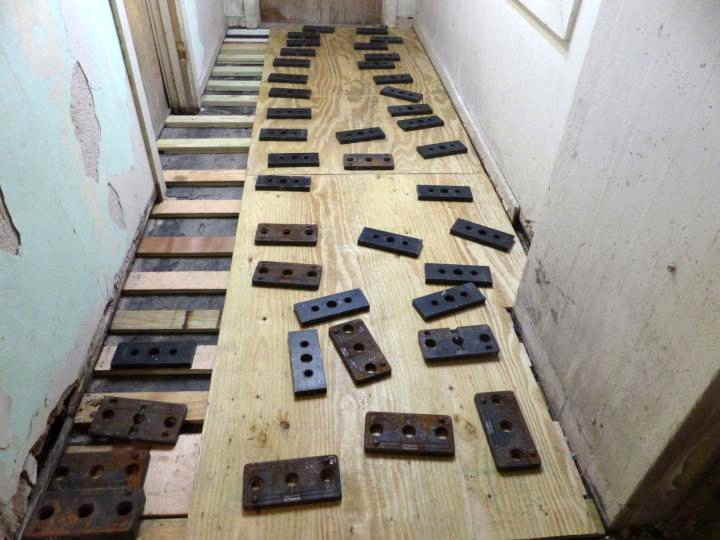
The floor is glued, screwed and weighted and should be quite secure. The small gaps will be filled in and the left side of the picture will have floor positioned on Saturday after the meeting. The wall sides will have storage units built and installed and all the door openings will be sealed up better than they are now.
Next a new ceiling and a bit more light will be added to better see our stash of supplies with.
Sun, 2016-02-28 09:53 — Hall Floor

This area was cleaned out and prepared for the next phase. Under the rotted oak was a very uneven floor. We will be installing pressure treated wood where contact will be made with the concrete and putting pressure treated plywood over top of this. With any luck this stuff will outlast us so we won't have to do it again when we are much older.

Still to be added are the shims that will bring our sub floor spacers to the desired thickness so we can take the worst irregularities out of the floor. Once we have done that and attached them to the sub floor plywood will cover the area and we should then have a nice clean and dry floor in the storage area.
Sun, 2016-02-28 09:53 — Basic Tools
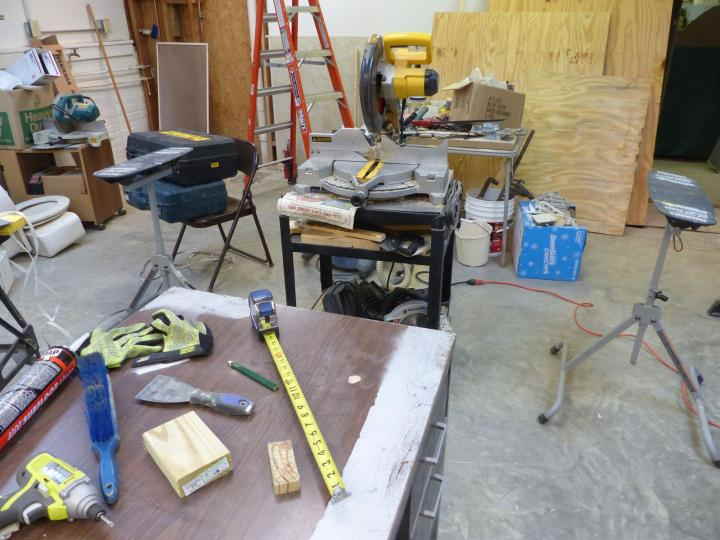
And some more basic tools and supplies for model railroading. While these were employed in the back room by some of us Ron was out and about at the various layouts fixing and detailing various things on the different layouts.
Tue, 2016-02-23 23:45 — Hallway
One of the things we discovered was an unused boarded up hallway that was connected to our new room. The place is now dry because we fixed the roof. The floor and ceiling had rotted away and was in many ways nothing but a pile of very bad decomposed tiles and wood. Clean up was in order.
The space is about 5 feet by 19 feet and would make a great storage closet that could have a connecting door to our new work room. That is the plan.

The recently cleaned floor area, and the rotted wood waiting to be cut into disposable sections.

Most of the floor and ceiling was recovered via a broom and shovel. The items used to look like oak flooring and ceiling tiles.
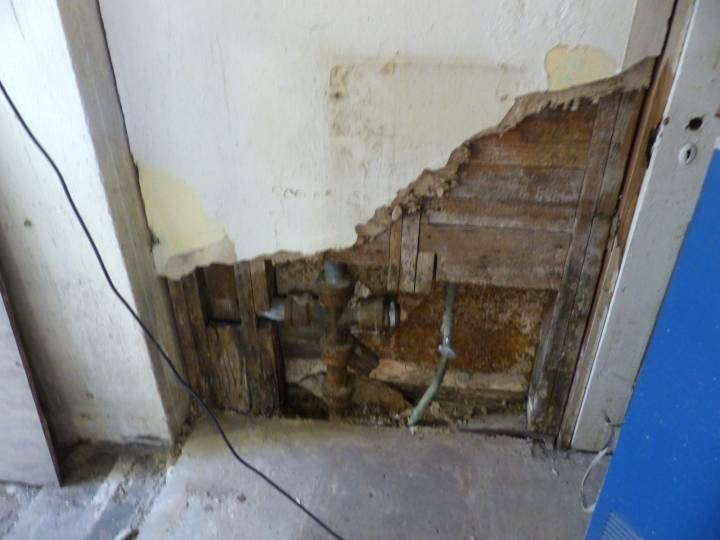
A little bit of plumbing work and a new section of wall needs to be completed.

The last of the pulled up rotted wood and the boxes and buckets were hauled out and put in the dumpster.
Sun, 2016-02-21 02:16 — Back Room

This photo shows the lights working and my having moved the camera setting to the wrong position at the time of the photo. A couple of photos like that today so I will apologize in advance for doing a poor job. Although trying to get good pictures was not my main focus today.
Sun, 2016-02-14 22:28 — Back Room

As a refresher the following photo showed what we had from nearly the beginning withe regard to the back room.

Now where we are now.
Thu, 2016-02-11 11:25 — Electrical Lighting
Supplies were unloaded, light bulbs or lamps if you prefer were installed in the fixtures and a test was done. Success! One of the nice things that was done in the wiring of the work room was a switch controlling the outlets for all the work bench areas. The switch was also tied to one of the ceiling light fixtures so that a very pronounced visual indication would be present. By doing so no one will be able to leave say a soldering iron on when we leave the club house. By designing the safety feature in we can hopefully avoid the disaster that would result from a fire.

The light in the closest row and on the left side is tied to the work bench circuit. The conduit feeds the outlets along the back and right wall and contains an independent circuit for the ac unit we will install later.

Here we have Tom M our long distance member who is a retired electrician working on the lights. He has been a huge plus to our club as he just jumps in and undertakes what ever he is good at that we are working on. It seems we are blessed with many folks like this that have talents in various areas and they are quite willing to jump in and work at what ever we are doing.
Sun, 2016-01-31 21:31 — Air Handler
Paul and I worked on the duct work and got that down before lunch. After lunch we went back and removed the big radiator sections and now all that is left to remove is some copper pipe that will be salvaged and the funds will be plowed back into the building fund.
We have pictures just like pictures of a trophy fish.
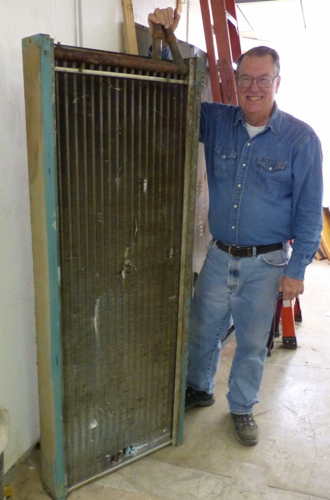
Paul with the first radiator catch of the day.
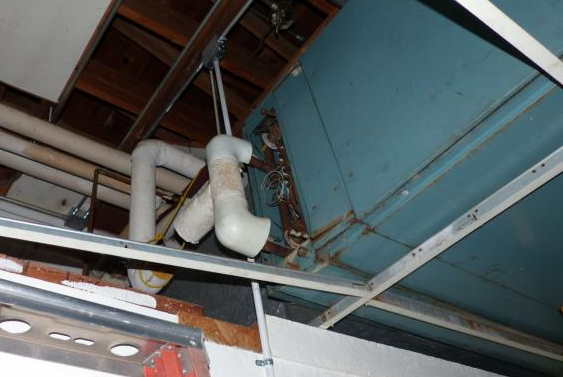
A before picture.

All that is left is some copper pipe, the angle iron and all thread that was holding this monster up there and some old wiring to deal with. After that, lights, ceiling tiles, insulation and the ceiling will be done. Those jobs are quick and easy by comparison.
Mon, 2016-01-25 08:39 — Air Handler

As can be seen from this photo the inside of that part of the air handler has been removed. It has not functioned in several decades and contained about 50 years worth of crap. When it was installed it went in as one unit and then a suspended ceiling and walls were added. It was not designed to be easily removed. Once we get the rest of this out of the way we will finish the lighting, and insulate and install ceiling tiles in the new room.

A couple of blowers that came out of the box, and yeah they were heavy and so was this motor. It looks about like the size that powers a heavy duty table saw or big jointer for comparison. As we get the thing apart it is easy to see why there was so much angle iron used to mount the thing to the roof.
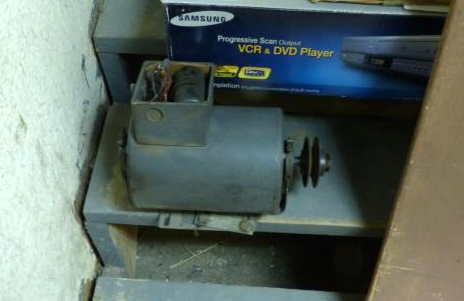
There was also some rather heavy mounting brackets to be removed, pulleys etc and sheet metal. Toss in some corroded fasteners in hard to reach areas and you can see a good time was had by all involved. We managed to get the junk out of there with out damaging the grid work for the ceiling. We also had another fun issue with lots of electrical conduit surrounding the unit as well as hot water lines from the boiler.
Sat, 2016-01-09 03:48 — Back Room
We discovered another heavy construction/demolition project that we can under take after the open house. There is a large non functioning air handler in the ceiling of our new room. We initially thought we would be unable to remove it from the ceiling until quite recently. The thing is in the way of several items, light installation, insulation, new ceiling tiles, electrical runs just to list a few. It is now planned for removal and with that monster out of the way we will be able to easily add lighting where needed and insulate the ceiling to improve our comfort level.
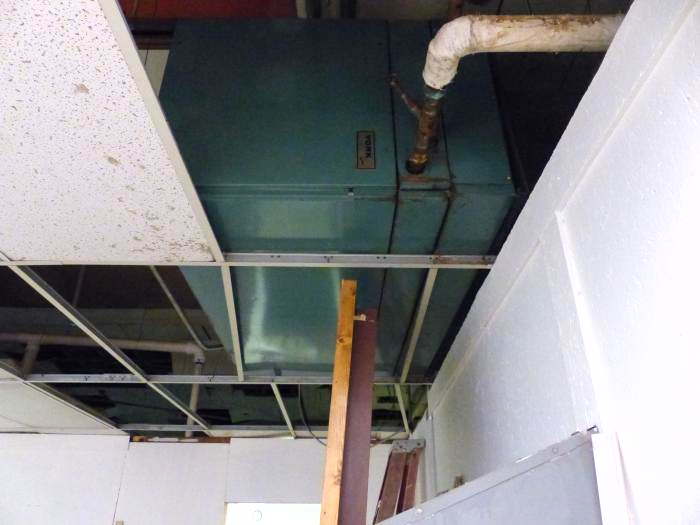
As can be seen this monster eliminates the option of adding a light fixture in several places in the ceiling.
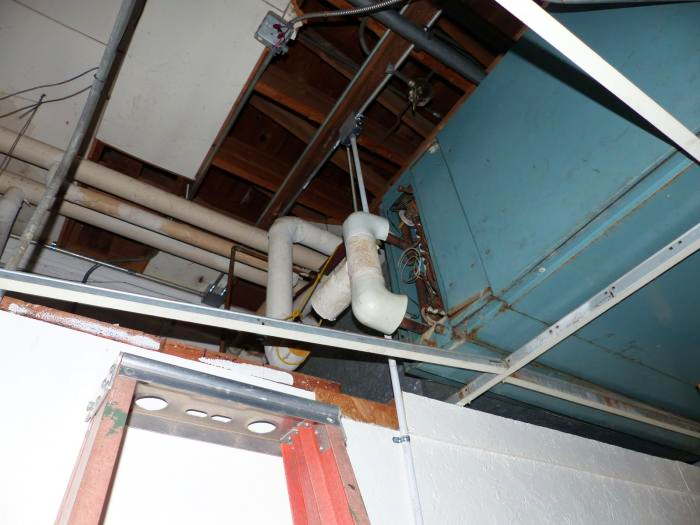
One more view

With that thing out of the way we can get after the smaller projects on the inside of the building and finish up the work on the outside. With those things complete we will then move on to the interior of the layout room and get the ceiling and lighting projects finished up. Who knows in the near future we may all get to be model railroaders again instead of as George calls us Carpenters.
Sun, 2015-12-20 17:45 — Back Room
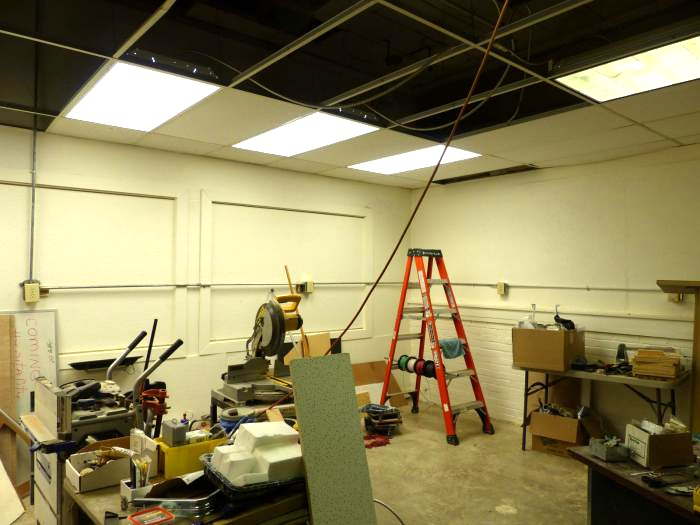
Here is an overall of the back room. Work is moving forward on lights, electrical, and plumbing. Painting and ceiling tile will be completed soon as well. The deal with projects like this is that lots of work takes place before anything looks like it was accomplished then all of a sudden things look like they are happening fast.
Sun, 2015-12-20 17:45 — Plumbing
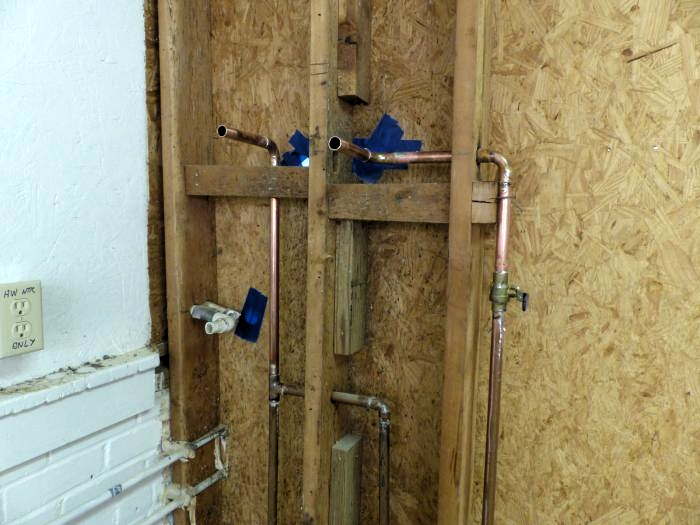
Here is the back side of the plumbing, new shut off in and out bound lines from the manifolds to the hot water lines and cold water lines after the water heater is installed. The electrical outlet is for the small hot water heater we will be using we are not expecting water to come out of there. We were able to find a small point of use model which will more than meet our needs for hand washing etc.
Sat, 2015-11-07 17:46 — Plumbing
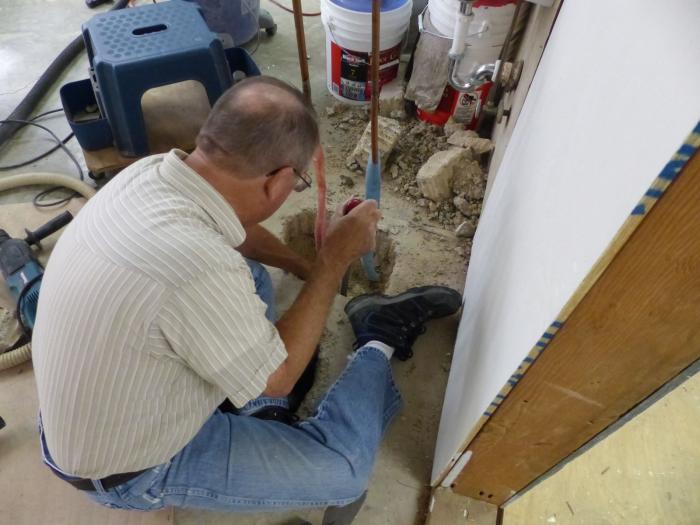
Here we have my friend Paul cleaning out shattered debris from where we were cutting through a slab so we can cap off the pipes below the slab. These pipes went to an old group of showers that we removed. The concrete was drilled and chiseled and then broken up and removed from the hole. There is another that we cut a hole in so we could install a P-trap and drain in the near future. After the plumbing is completed we will fill the holes with new concrete.
Photo 2
Here we have some of the larger chunks removed from one of the holes. In addition to removing the concrete we needed to take care so as not to damage the pipes running through the slab in the area.
Photo 3
We will be installing two more of these. One at each side of the room. Better to have them and not need them than to need them and not have them. We will also be installing a hot water heater. When completed we will have 3 toilets, one urinal, two sinks with hot and cold running water. WOO HOO. For open houses we will actually have a men's and ladies' room that will be much nicer than the crude facilities we have at present.
Fri, 2015-09-25 01:16 — New Door
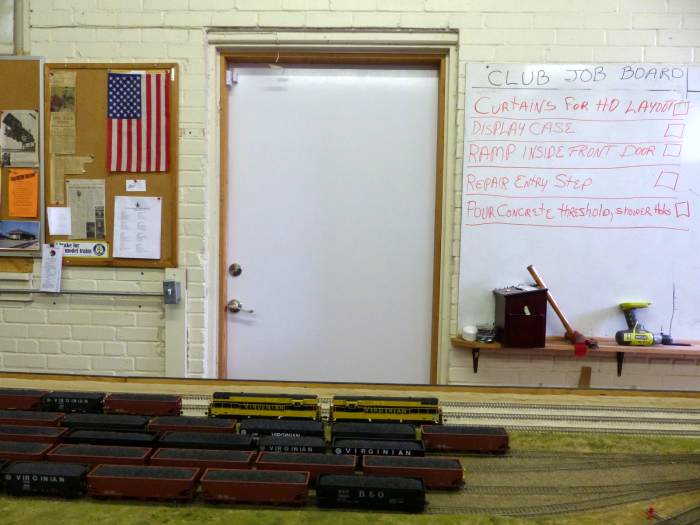
Here is a shot of the new door from inside the club and the job board. It is working quite well and is quite the visual improvement over the old door. As you can see I lost on the request for yellow and black for a color scheme.

Here it is from the out side. As you can see it is quite an improvement over the old door.
Mon, 2014-09-01 07:37 — Windows
We managed to tear off the old sheeting covering seven windows. The windows are large institutional size windows, 3 feet 10 inches wide by 8 feet 6 inches tall. It takes more than a sheet of plywood to cover each of them.
We framed in support structure for the new sheeting and installed insulation over the old windows. Any broken panes of glass which there were many were replaced with plastic. After framing and insulation the new 1/2 cdx plywood was installed.
Seven windows in the heat is about two too many. We got it done but it was an 8 hour work day. We were tired by the end of the day. Our youngest member was the only one that did not look exhausted, this young man is in the final year of college and a student athlete, no wonder he was not exhausted.
Still to complete some final scraping of the metal lintels caulking and painting. Hopefully that will be completed on Sunday.

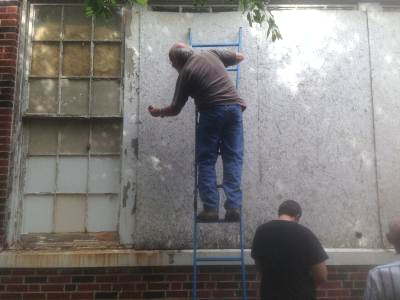
The two photos above show you what we started with, at the top and part of the construction process below. In the bottom photo Bob E is on the ladder removing screws so the panels can be removed and ultimately replaced. On the ground next to the ladder is Jared and to the right filling in as side walk superintendent is Leroy.
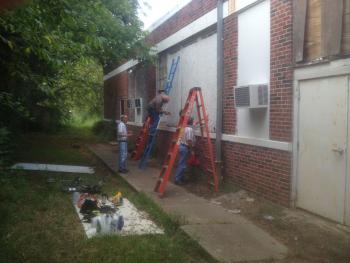

As you can tell from the photos Leroy forgot his shovel so he had nothing to lean on. In the left photo we have from left to right closest to the building Bob, Jared, Paul, and on the sidewalk Leroy. Now in actuality Leroy is acting as a gofer for things that we need while up on the ladder or otherwise occupied, he also functions as a rather large third hand device to keep tools screws etc flowing to the other parties that are engaged in some activity.
In the photo to the right of the double doors you can see the other three windows we tackled today. and you can see that the project also involves some pipes that will need to be allowed for and accommodated. Not pictured is Ron and Bob A both of whom managed to avoid my photos today.

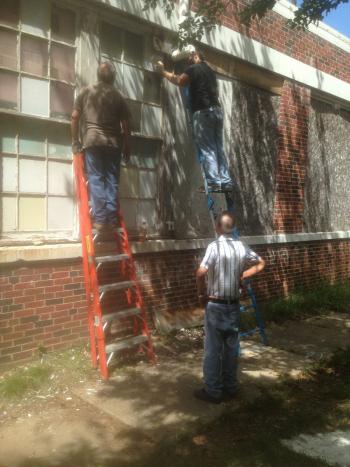
Photo (left) shows the framing and insulation that was installed prior to covering with plywood. Photo (right) shows some of the plastic panels being installed to fill in where glass was broken. The crew did a great job on removal, clean up, insulation, and installing all the components involve in this project. Tomorrow calking and painting will commence with a greatly reduced crew, likely Paul and Rob. I will shoot a couple more photos to post then but what we are looking for is the finished look like that of the ac unit with the white area surrounding it.
Sun, 2014-08-24 11:02 — Floor Repair
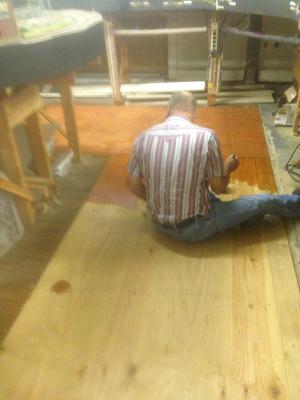
Paul and myself managed to get stain and sealer on the floor sections that have been replaced as well as 2 coats of paint on the section of the work room that has had the new ac unit installed so other than some trim that will go around the ac unit that is finished.
Sun, 2014-08-24 11:02 — Floor Repair
Photo 2

The reason we were working on the floor is best illustrated by a top and bottom photo of a section of flooring. I'll post 2 photos above and below. As can be seen in addition to ourselves termites have been working as well.
Sun, 2014-08-24 11:02 — Floor Repair
Photo 3

Fri, 2014-08-08 22:08 — AC Installation
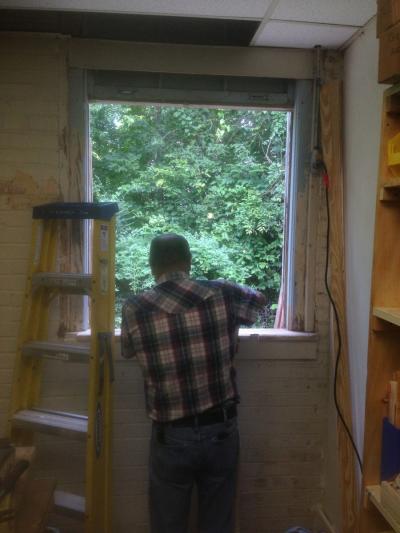
In this picture Paul is working on some issues with the window that will end up with a new ac unit. We have now raised the window and actually gotten it to open all the way up. A very time consuming undertaking as it was warped, chewed on by squirrels, nailed and painted shut, and suffering from about 60 years of neglect, but other than that it was fine, oh did I mention the broken panes of glass? Things were put in order and later that day we had the AC unit installed, insulation on the outside and a new plywood covering.
Fri, 2014-08-08 22:08 — AC Installation
Photo 2

The wood has been primed since this photo and the finish coat goes on the outside Saturday morning. We also plan on finishing the inside Saturday and hope to have everything painted with the first coat on Saturday as far as the double doors in the work room.
Fri, 2014-08-08 22:08 — Floor Repair
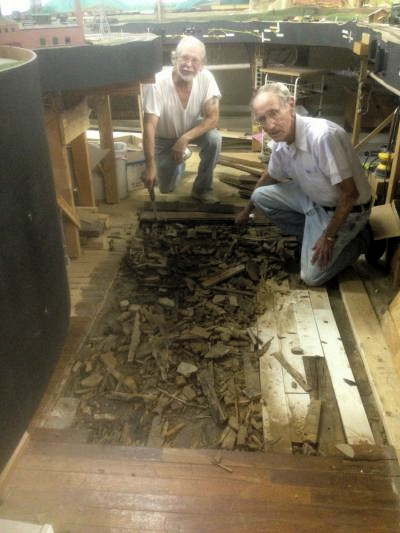
In this image we have Bob A in the rear and his assistant Leroy on the right working on the repairs to the rotted flooring by the center peninsula of the ho layout. This area is one of the highest traffic areas on the floor and was in desperate need of work. In addition to the two guys pictured Bob has also been assisted by George, Bob E, Tom B, Paul, Rob and Jared on various occasions and in various amounts. Bob A has been the ram rod on this project and is really keeping it going. Since this photo was taken the sub floor has been replaced and a new sheet of Plywood placed over the sub floor. All that is needed now is some fasteners and some finish and we will get to call that job done.